
Assembly Instruction 3D-Handrail-connection |
PDF download: Assembly Instructions.pdf | |||
|
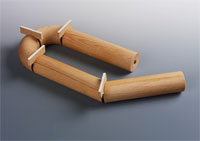
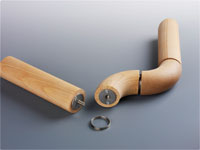
First you’ve got to screw up the handrail elements as well as the distance piece, so that all elements fit closely (Zero Point).
Now you’ve got one turn in reserve and we can align all elements exactly as desired. Please bring the elements in line with a distance piece of 5mm (chumps). After that please round and seal the corners. |
 |
|||
|
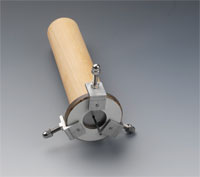
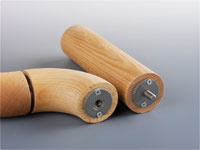
It’s important to stick in the metal pieces, so that you’ve got a supporting force.
|
 S1 + R1 |
|||
|
Now you can put on the final pieces (90°).
|
 R1 |
|||
|
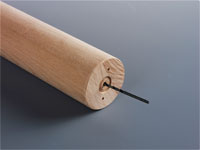
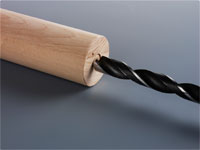
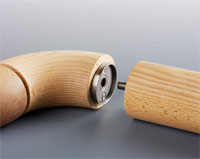
Please drill three wholes (whole pattern)
You need two drills for the screws of d = 2.5 mm/depth = 15mm and one whole for the axis drill. |
 |
|||
|
Please drill out the axis with a 16mm drill and a depth of 15mm.
|
 |
|||
|
Now you can screw up the binders mutually. (threaded rod/nut)
|
 |
|||
|
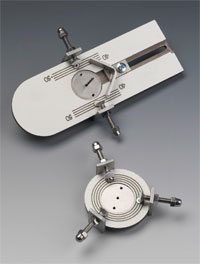
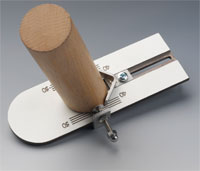
You can align the final pieces (90° C cuts) exactly by using the angel abutment.
The middle point has to be determined by calculating and should be fixed by aide of the abutments. |
 S1 |
|||
|
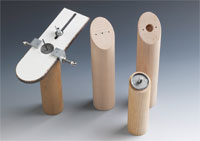
Now you should make three drills again.
(Please take a look at the whole pattern above) |
 S1 |
|||
|
At least you can screw up the binders mutually, put on the distance piece and screw both up to the zero point as well.
Please take into consideration, that the elements shouldn’t be longer than 150mm. |
  |
|||